Water Heater Maintenance: How to Flush, Inspect, and Extend the Life of Your Hot Water Tank
Learn how to maintain your water heater with flushing, anode rod checks, and temperature settings. Extend your tank's lifespan by 3-5 years with proper care.
Water Heater Maintenance: How to Flush, Inspect, and Extend the Life of Your Hot Water Tank
Your water heater is one of the hardest-working appliances in your home. It runs 24 hours a day, 365 days a year, maintaining a reserve of hot water for showers, dishwashing, laundry, and cleaning. It's also one of the most expensive appliances to replace, with installed costs ranging from $1,500 to $6,000 depending on the type and model.
Despite this, most homeowners completely ignore their water heater until it fails. No flushing, no inspections, no maintenance of any kind. They install it and forget it - until they wake up to cold water or a flooded basement.
In the Okanagan, where hard water accelerates sediment buildup and shortens equipment lifespans, neglecting your water heater is particularly costly. The good news is that basic water heater maintenance is straightforward, and doing it consistently can extend your unit's life by 3 to 5 years while keeping it running efficiently the entire time.
This guide covers everything you need to know: the differences between tank and tankless maintenance, how to flush sediment, the critical role of the anode rod, optimal temperature settings, signs of impending failure, and a complete maintenance schedule.
Tank vs. Tankless: Understanding Your Water Heater
Before diving into maintenance, it's important to understand what type of water heater you have, because maintenance requirements differ significantly.
Tank Water Heaters
The majority of Okanagan homes have conventional tank water heaters. These units maintain a reservoir of hot water (typically 40 to 60 gallons for a family home) that's continuously heated and ready for use. They're powered by natural gas, propane, or electricity.
Tank water heaters are simpler in design but have more maintenance requirements. The stored water means sediment constantly settles at the bottom, the anode rod is continuously dissolving, and the tank itself is always under thermal stress. Average lifespan is 8 to 12 years, though neglected units in hard water areas may fail in as little as 6 years.
Tankless Water Heaters
Tankless (on-demand) water heaters heat water as it flows through the unit, providing hot water without a storage tank. They're more energy-efficient and typically last longer (15 to 20 years), but they're not maintenance-free.
Tankless units require annual descaling to remove mineral buildup from the heat exchanger. In the Okanagan's hard water, this is not optional - a scaled-up heat exchanger loses efficiency, produces inconsistent temperatures, and eventually fails. Tankless units also have in-line filters that need regular cleaning.
Not sure what type of water heater you have? If it's a large cylindrical tank (usually in a utility room, basement, or garage), it's a tank water heater. If it's a wall-mounted box roughly the size of a small suitcase, it's tankless. Check the manufacturer's label for the model number and age.
Why Sediment Is Your Water Heater's Worst Enemy
The single biggest threat to your water heater's health is sediment buildup. Understanding this threat is the key to understanding why maintenance matters.
Okanagan water is hard. It contains dissolved minerals, primarily calcium and magnesium, that precipitate out of solution when water is heated. These minerals settle at the bottom of your water heater tank as a layer of sedite - a chalky, sometimes sandy residue that accumulates over time.
Here's what sediment does to your water heater:
Reduces heating efficiency. In a gas water heater, the burner sits below the tank. Sediment between the burner and the water acts as insulation, forcing the burner to run longer to heat the water. In an electric water heater, sediment buries the lower heating element, reducing its effectiveness. Either way, you're paying more for less hot water.
Causes overheating and hot spots. When sediment insulates the bottom of a gas water heater, the tank floor overheats. This can warp the tank bottom, damage the glass lining, and create hot spots that accelerate corrosion. Over time, these hot spots can cause the tank to fail.
Creates noise. The popping, rumbling, or crackling sounds you hear from your water heater are caused by water trapped beneath sediment being superheated and turning to steam. These steam bubbles push through the sediment layer, creating those distinctive sounds. If your water heater is making noise, it has sediment buildup.
Clogs drain valves and pipes. As sediment accumulates, it can migrate into the drain valve, hot water supply line, and throughout your plumbing system. This leads to reduced flow, clogged aerators, and particles in your hot water.
Shortens tank lifespan. The combination of reduced efficiency, overheating, and accelerated corrosion from sediment buildup can cut years off your water heater's life. A tank that should last 12 years may fail in 7 or 8 without regular flushing.
Plumbing Inspection
Starting at $185/visit - included in your plan
How to Flush Your Water Heater: Step-by-Step
Flushing your water heater is the most important maintenance task you can perform. It removes accumulated sediment and restores efficiency. Here's how to do it properly.
What You'll Need
- A garden hose long enough to reach a floor drain or exterior location
- A large bucket (optional, for checking sediment levels)
- Gloves (the water will be hot)
- A flathead screwdriver (for some drain valves)
Flushing a Tank Water Heater
Step 1: Turn off the heat source. For a gas water heater, turn the gas valve to the "pilot" position. For an electric water heater, switch off the circuit breaker. Never drain a tank with the heating element active - running a dry heating element will destroy it.
Step 2: Connect a garden hose to the drain valve. The drain valve is located near the bottom of the tank. It looks like a standard hose bib. Attach the hose and route it to a floor drain, utility sink, or outdoors. Make sure the end of the hose is lower than the drain valve so gravity can do its work.
Step 3: Open a hot water faucet upstairs. This breaks the vacuum in the system and allows the tank to drain properly. Any hot water faucet in the house will work - just leave it running.
Step 4: Open the drain valve and let the tank drain. The water will be hot, so be careful. Let the first few gallons flow into a bucket so you can see the sediment. If the water is cloudy with visible particles, the flush is doing its job.
Step 5: Flush with fresh water. Once the tank has drained, briefly turn the cold water supply back on to flush remaining sediment out through the drain. Let it run for 3 to 5 minutes or until the water runs clear. You may need to repeat this step if there's heavy sediment buildup.
Step 6: Close the drain valve and refill the tank. Close the drain valve, disconnect the hose, and turn the cold water supply fully on. The tank will begin to refill. Leave the upstairs hot water faucet open until water flows steadily from it - this means the tank is full and all air has been purged.
Step 7: Restore the heat source. Turn the gas valve back to "on" or flip the circuit breaker back on. Wait 30 to 60 minutes for the water to reheat.
If you haven't flushed your water heater in several years, the drain valve may be clogged with sediment. Don't force it - a broken drain valve creates a much bigger problem. If the valve won't open or water won't flow, call a professional. They have tools and techniques to clear clogged valves safely.
Descaling a Tankless Water Heater
Tankless water heaters don't accumulate sediment the same way, but mineral scale builds up on the heat exchanger. Descaling requires circulating a descaling solution (typically food-grade white vinegar or a commercial descaling product) through the unit.
Step 1: Turn off the gas or electrical supply to the unit.
Step 2: Close the hot and cold isolation valves on the unit.
Step 3: Connect a small submersible pump to the cold water service port. Place the pump in a bucket filled with 3 to 4 gallons of white vinegar or descaling solution.
Step 4: Connect a hose from the hot water service port back to the bucket, creating a circulation loop.
Step 5: Run the pump for 45 to 60 minutes, circulating the descaling solution through the heat exchanger.
Step 6: Drain the solution, flush with clean water, close the service ports, open the isolation valves, and restore power.
Step 7: Clean the in-line filter screen while the unit is shut down.
Most tankless manufacturers recommend professional descaling annually. The process requires specific tools (service valves, a pump, and descaling solution) and incorrect procedure can damage the unit.
The Anode Rod: Your Tank's Sacrificial Protector
Inside every tank water heater is a component most homeowners have never heard of: the anode rod. Understanding this rod is critical to extending your water heater's life.
What Is an Anode Rod?
An anode rod is a metal rod (usually magnesium, aluminum, or zinc-aluminum alloy) suspended inside your water heater tank. Its purpose is to corrode instead of your tank. The rod attracts the corrosive elements in your water, sacrificing itself to protect the steel tank lining. This is called "cathodic protection."
Why It Matters
When the anode rod is intact, it absorbs corrosion that would otherwise eat through your tank. When the rod is depleted, the corrosive elements in the water turn to the next available metal: your tank. Once tank corrosion begins, it's only a matter of time before the tank develops a leak. A leaking tank cannot be repaired. It must be replaced.
Inspection and Replacement
The anode rod should be inspected every 2 to 3 years and replaced when it's more than 50% depleted. In the Okanagan's hard water, anode rods may deplete faster than in soft water areas, so annual inspection is ideal.
A healthy anode rod is a solid rod about 3/4 inch in diameter. A depleted rod will be significantly thinner, pitted, covered in calcium deposits, or reduced to a bare wire core. Some rods may have large chunks missing.
Replacing an anode rod costs $20 to $50 for the part and $100 to $200 for professional installation. Compared to a $2,000+ water heater replacement, this is one of the most cost-effective maintenance tasks in your home.
Here's a simple way to think about it: a $30 anode rod replacement every 3 years costs about $10 per year. That $10 per year can extend your water heater's life by 3 to 5 years, saving you $1,500 to $3,500 in replacement costs. There's no better return on investment in home maintenance.
Plumbing Inspection
Starting at $185/visit - included in your plan
Temperature Settings: Finding the Sweet Spot
Your water heater's temperature setting affects energy costs, safety, bacterial growth, and equipment lifespan. Getting it right matters more than most people realize.
The Recommended Setting: 49C (120F)
The sweet spot for most households is 49C (120F). This temperature is:
- Hot enough to kill most waterborne bacteria and provide comfortable hot water for all household uses
- Cool enough to significantly reduce scalding risk, especially important in homes with children or elderly residents
- Efficient - every 5C reduction in temperature setting saves 3 to 5% on water heating energy costs
The Legionella Question
Some sources recommend higher temperatures (60C / 140F) to prevent Legionella bacteria growth in the tank. Legionella can cause Legionnaires' disease, a serious form of pneumonia. The bacteria thrive in water between 25C and 45C and are killed at temperatures above 55C.
For most residential settings, 49C is considered safe because the water circulates regularly and doesn't stagnate. However, if anyone in your household is immunocompromised, or if the home is frequently unoccupied for extended periods (allowing water to stagnate), setting the temperature to 54C (130F) provides an additional safety margin.
Water Heater Temperature and Tank Life
Higher temperature settings accelerate sediment formation, increase thermal stress on the tank, and cause the anode rod to deplete faster. Running your water heater at 60C instead of 49C doesn't just cost more in energy - it shortens the life of the equipment. Unless you have a specific reason to run at a higher temperature, 49C is optimal for both performance and longevity.
How to Check and Adjust Your Temperature
Gas water heaters have a temperature dial on the gas valve, usually near the bottom of the unit. The dial may show exact temperatures or vague labels like "warm," "hot," and "very hot." If it uses labels, "warm" typically corresponds to about 38C, "hot" to about 49C, and "very hot" to about 60C.
Electric water heaters have thermostats behind access panels on the side of the tank (usually two - upper and lower). You'll need to remove the panels, pull back the insulation, and adjust the thermostat with a flathead screwdriver. Always turn off the circuit breaker before accessing electric water heater panels.
To verify the actual water temperature, let hot water run from the nearest faucet for 2 minutes, then measure with a cooking thermometer. The temperature at the faucet may be slightly lower than the tank setting due to heat loss in the pipes.
The Pressure Relief Valve: A Critical Safety Check
Every water heater has a temperature and pressure (T&P) relief valve, usually located on the side or top of the tank with a discharge pipe running down to floor level. This valve is a critical safety device that opens to release water if the temperature or pressure inside the tank exceeds safe levels.
Why Testing Matters
A malfunctioning T&P valve can allow dangerous pressure to build inside the tank. In extreme cases, an over-pressurized water heater can rupture or even explode. While these events are rare, they're catastrophic. Testing the valve annually takes 30 seconds and verifies that this safety device is functional.
How to Test
Place a bucket under the discharge pipe. Lift the lever on the T&P valve briefly (1 to 2 seconds). Water should flow through the discharge pipe and stop when you release the lever. If the valve doesn't release water, or if it continues to drip after you release it, the valve needs replacement. This is a $20 to $30 part and a straightforward job for a plumber.
The water released from the T&P valve is hot. Always use a bucket, keep hands clear of the discharge pipe, and wear gloves. If the valve is stuck and won't lift, don't force it - call a professional.
Plumbing Inspection
Starting at $185/visit - included in your plan
Signs Your Water Heater Is Failing
Water heaters rarely fail without warning. Recognizing the signs gives you time to plan a replacement instead of dealing with an emergency. Here are the warning signs every homeowner should know.
Age
The most reliable predictor of water heater failure is age. If your tank water heater is 8 to 12 years old, it's entering the failure window. If it's over 12, you're on borrowed time. Check the serial number on the manufacturer's label - it typically contains the manufacture date (often coded as the first four digits: month and year).
Rust-Colored Hot Water
Brown or rust-colored water from your hot water taps (but not your cold taps) indicates corrosion inside the tank. Once the tank is corroding, the anode rod is depleted and the tank's protective lining has been compromised. This is often the beginning of the end.
Rumbling, Popping, or Banging Sounds
As sediment builds up and hardens at the bottom of the tank, the sounds get louder and more persistent. By the time the rumbling is clearly audible from another room, the sediment layer is likely thick enough to be causing significant efficiency loss and tank damage.
Leaks Around the Base
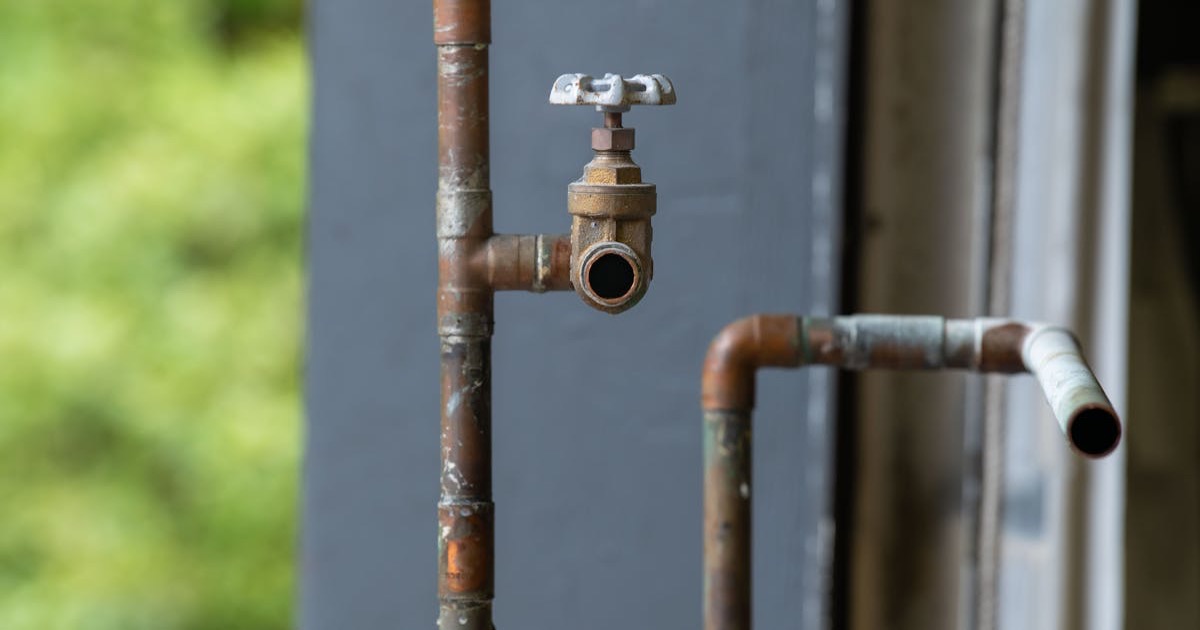
Any moisture or pooling around the base of the water heater is a red flag. Check the T&P valve discharge pipe, the drain valve, and the supply line connections first - these are repairable. But if water is seeping from the tank itself, the tank has corroded through and replacement is the only option.
Inconsistent Water Temperature
If your hot water is fluctuating between hot and lukewarm without changes in demand, the heating element (electric) or thermocouple (gas) may be failing. These components can be replaced individually, but if the unit is old, component failure often signals broader decline.
Increased Energy Bills
A water heater losing efficiency to sediment buildup and aging components uses more energy to produce less hot water. If your energy bills are climbing without other explanation, your water heater may be working harder than it should.
Not Enough Hot Water
If your household isn't using more hot water than usual but you're running out sooner, sediment may be displacing water volume in the tank, or the heating elements may be underperforming.
Complete Water Heater Maintenance Schedule
Here's a year-round maintenance schedule that will maximize your water heater's lifespan and performance.
Monthly:
- Listen for unusual sounds (popping, rumbling, banging)
- Check the area around the base for moisture or leaks
- Verify the pilot light is lit (gas units)
Every 6 Months:
- Test the T&P relief valve
- Check the temperature setting
Annually:
- Flush the tank to remove sediment (or descale tankless units)
- Inspect the anode rod
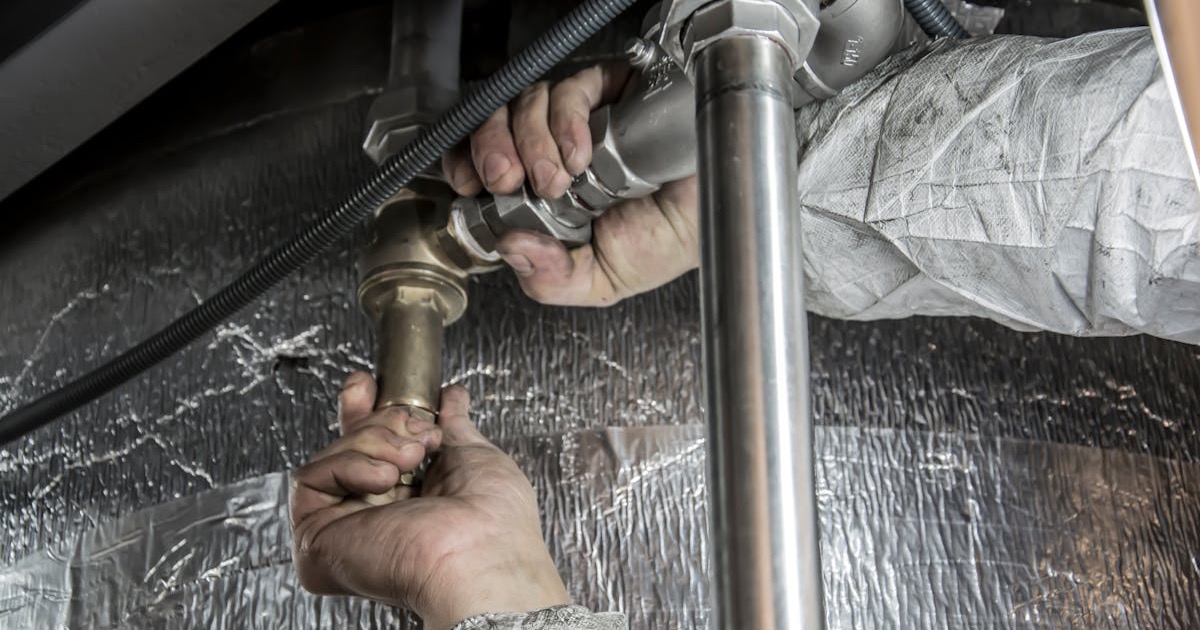
- Check all supply line connections for drips or corrosion
- Inspect the flue and venting (gas units) for proper draft and corrosion
- Clean the burner assembly (gas units) or inspect heating elements (electric units)
- Check for adequate clearance around the unit (combustible materials, storage items)
- Verify the drain pan is intact and the drain line is clear (if installed)
Every 3 to 5 Years:
- Replace the anode rod (sooner if inspection shows significant depletion)
- Replace flexible supply lines if they're older than 5 years
At Year 10 (Tank Units):
- Begin planning for replacement
- Get quotes so you're prepared when the unit reaches end-of-life
- Consider upgrading to a more efficient model or switching to tankless
What's Included in My Home Plan's Water Heater Service
My Home Plan's plumbing inspection includes a comprehensive water heater evaluation as part of the $175 annual visit. Here's what our technicians check:
- Tank age and condition assessment
- Complete tank flush and sediment removal
- Anode rod inspection with replacement recommendations
- T&P relief valve test
- Temperature setting verification and adjustment
- Supply line and connection inspection
- Flue and venting check (gas units)
- Efficiency evaluation
- Remaining lifespan estimate
- Written report with findings and recommendations
Our technicians are familiar with Okanagan water conditions and know how hard water affects water heater performance. We don't just check boxes - we give you honest, practical advice about maintaining your specific unit and planning for eventual replacement.
Take Care of Your Water Heater Before It Demands Your Attention
Your water heater is quietly working right now, heating water for your next shower, your next load of laundry, your next sink full of dishes. It does this every day without complaint - until it can't anymore.
Annual maintenance is the difference between a water heater that serves you reliably for 12 to 15 years and one that fails at 7, flooding your utility room and leaving you with cold showers and a $3,000 replacement bill. In the Okanagan, where hard water makes every water heater work harder and wear out faster, skipping maintenance isn't saving money. It's spending more of it later.
Schedule your annual plumbing inspection with My Home Plan and give your water heater the attention it deserves. Your future self - the one enjoying a hot shower instead of calling an emergency plumber - will thank you.
Ready to simplify your home maintenance?
Get all your home services in one monthly plan. Vetted contractors, guaranteed scheduling, predictable pricing.
Frequently Asked Questions
Why Homeowners Choose My Home Plan
Predictable Pricing
One monthly payment covers everything. No surprise quotes or hidden fees.
Vetted Contractors
Every contractor is background-checked, insured, and reviewed.
Zero Hassle
We handle scheduling, quality control, and follow-ups. You relax.
Related Articles

10 Common Plumbing Problems and What They Cost to Fix
Every homeowner will deal with plumbing problems. This guide covers the 10 most common issues, their warning signs, whether you can fix them yourself, what a professional repair costs, and how to prevent each one from happening in the first place.
Annual Plumbing Inspection: What It Includes and Why Every Okanagan Homeowner Needs One
A professional plumbing inspection covers over 15 critical checkpoints in your home, from visible pipe condition to water heater performance. Learn exactly what's included and why scheduling one annually can prevent thousands in emergency repairs.
How to Prevent Frozen Pipes in the Okanagan: The Complete Winter Plumbing Guide
Okanagan winters regularly push temperatures below -15C, putting your plumbing at serious risk. This guide covers which pipes freeze first, step-by-step prevention, warning signs of freezing, and exactly what to do if your pipes freeze or burst.