How to Prepare for Interior and Exterior Painting: A Complete Homeowner Guide
Complete guide to preparing for home painting. Surface prep, choosing colors and finishes, hiring painters, and timeline expectations for interior and exterior projects.
Painting is one of the highest-impact improvements you can make to a home. A fresh coat of paint transforms rooms, refreshes curb appeal, and protects surfaces from wear and weather. But the paint itself is only part of the equation. The preparation - surface condition, product selection, color choices, and contractor quality - determines whether the result is a paint job that looks professional and lasts, or one that peels, fades, and disappoints within a year or two.
This guide covers everything you need to know before paint touches a surface. Whether you are planning an interior refresh, a full exterior repaint, or both, the preparation process is what separates a good result from a great one.
Interior Painting Preparation
Assessing What Needs Work
Walk through every room you plan to paint with a critical eye and a notepad. For each room, note the current wall condition (cracks, nail holes, dents, peeling paint, water stains), ceiling condition (stains, cracks, texture damage), trim condition (chipped paint, gaps between trim and wall, damaged wood), the current paint sheen and color, and any special challenges (high ceilings, accent walls, textured surfaces, wallpaper).
This assessment determines the level of preparation needed, which directly affects the project timeline and cost.
Surface Preparation Checklist
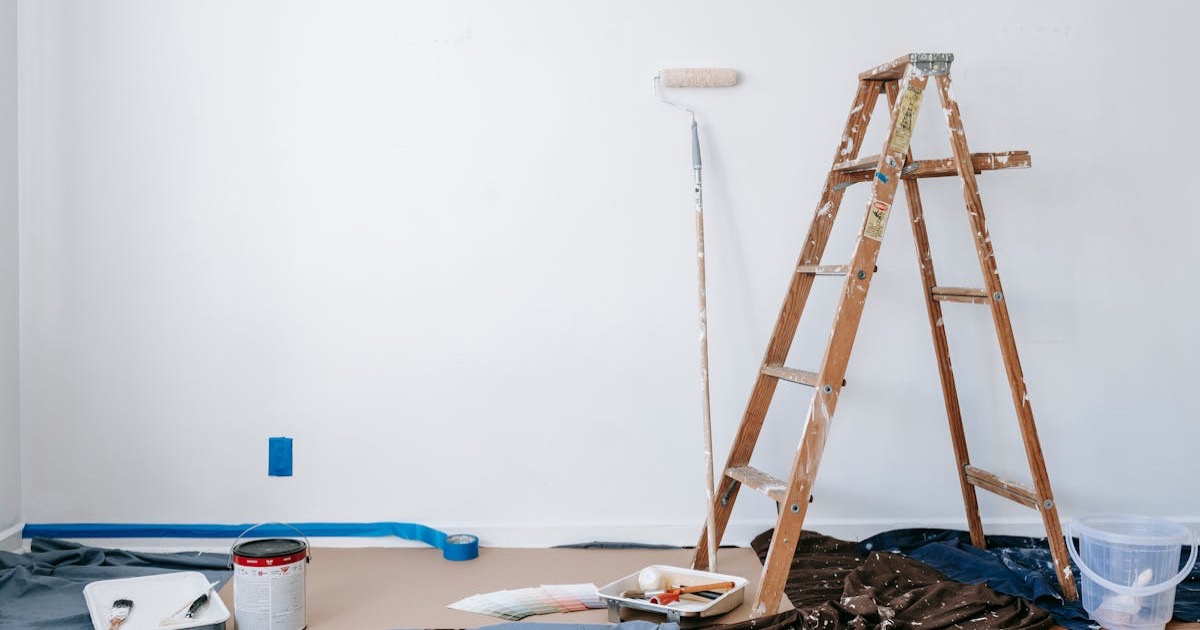
Good preparation is 80 percent of a good paint job. Here is what needs to happen before any paint is applied.
Patching and repair:
- Fill nail holes and small dents with lightweight spackling compound
- Patch larger holes (over 1 inch) with a patch kit and joint compound
- Repair drywall cracks with mesh tape and joint compound (multiple thin coats, sanded smooth between coats)
- Replace damaged trim sections
- Re-caulk gaps between trim and walls, around windows, and along baseboards
Sanding:
- Sand all patched areas smooth
- Lightly sand glossy surfaces to create tooth for the new paint to grip
- Sand any areas where old paint is peeling or flaking back to a solid edge
- Vacuum or wipe all sanding dust before painting
Priming:
- Prime all patched and repaired areas (untreated spackle absorbs paint differently than surrounding surfaces, creating visible spots called "flashing")
- Prime bare wood or bare drywall
- Use stain-blocking primer over water stains, smoke damage, or persistent marks
- Prime when changing from dark to light colors (tinted primer saves multiple topcoats)
Cleaning:
- Wash kitchen and bathroom walls with TSP (trisodium phosphate) or a degreasing solution to remove grease film and soap residue
- Dust all surfaces including baseboards, door frames, and window sills
- Clean and dust ceiling fan blades, light fixtures, and vent covers
The most common painting mistake is insufficient patching. After the first coat of paint, every imperfection you did not address becomes glaringly visible. Fill every nail hole, sand every rough spot, and prime every patch. This takes time but it is what makes painted walls look smooth and professional.
Choosing Interior Paint Colors
Color selection causes more project delays than any other decision. Here are practical strategies for making color choices efficiently.
Start with your fixed elements. Look at what is not changing - flooring, countertops, tile, cabinetry, major furniture pieces. Your wall color needs to complement these elements, not compete with them.
Test before committing. Buy sample pots ($5 to $8 each) and paint large swatches (at least 12 inches by 12 inches) on the actual walls. View them in morning light, afternoon light, and evening artificial light. Colors look dramatically different under different lighting conditions. A color that looks warm and inviting in the store can look pink or yellow on your walls under your specific lighting.
Use the 60-30-10 rule. In any room, the dominant color covers 60 percent of the visual space (typically walls), a secondary color covers 30 percent (upholstery, curtains, rugs), and an accent color covers 10 percent (throw pillows, art, accessories). This creates visual balance.
Consider flow between rooms. In open-concept homes (common in Okanagan new construction), the colors visible from any single viewpoint should coordinate. This does not mean every room must be the same color, but adjacent spaces should share undertones.
Neutrals are not boring. Warm whites, greiges (gray-beige blends), and soft taupes are the most popular choices for good reason - they work with virtually any furnishing style, photograph well for real estate listings, and do not date as quickly as trend colors.
Choosing Interior Paint Finishes
Flat/Matte: Hides imperfections well, provides a sophisticated look. Not washable - marks and scuffs are difficult to clean without leaving shiny spots. Best for ceilings and low-traffic rooms like formal living rooms and adult bedrooms.
Eggshell: Slight sheen, more washable than flat, still hides minor imperfections. The most popular choice for living rooms, dining rooms, and bedrooms.
Satin: Moderate sheen, durable and washable. Good for high-traffic areas, hallways, children's rooms, and bathrooms. Shows surface imperfections more than eggshell.
Semi-gloss: High sheen, very durable and scrubable. Standard for trim, doors, and cabinetry. Also used in kitchens and bathrooms where moisture resistance is important.
High-gloss: Highest sheen, extremely durable. Rarely used on walls (shows every imperfection). Sometimes used on front doors and detailed trim for a polished look.
Preparing the Room
Move or cover furniture. Move everything possible out of the room. What cannot be moved should be pulled to the center and covered with drop cloths. Professional painters move furniture as part of the job, but if you want to save money on a DIY project, do this yourself before the painter arrives.
Remove wall hangings, outlet covers, and light switch plates. Remove all picture hangers, curtain hardware, and wall-mounted items. Remove outlet covers and light switch plates (a 2-minute job that makes cutting in dramatically easier and cleaner).
Protect floors. Canvas drop cloths are preferred over plastic (plastic is slippery and paint can seep under it). Cover the entire floor area being painted, extending at least 4 feet from the walls.
Remove or protect fixtures. If light fixtures, cabinet hardware, or other fixtures are staying in place, mask them carefully with painter's tape and plastic sheeting.
Exterior Painting Preparation
Assessing Exterior Condition
Exterior paint preparation is more involved than interior because the surfaces are exposed to weather, UV, moisture, and temperature extremes.
Walk the perimeter and document siding condition (peeling, cracking, chalking, bare wood, rot, damage), trim condition (paint failure, wood rot, gaps), caulking condition (cracked, missing, or pulling away from surfaces), foundation-to-siding transition (moisture wicking, splash-back damage), fascia and soffit condition, window and door frame condition, and any areas with visible mold, mildew, or algae growth.
Exterior Surface Preparation
Power washing: Before any scraping, filling, or priming, the entire exterior should be washed to remove dirt, chalking paint, mildew, and debris. This is where pressure washing adds significant value. Use appropriate pressure for each surface type. Allow the house to dry completely (48 to 72 hours in the Okanagan's dry climate) before proceeding.
Scraping and sanding: All loose, peeling, and flaking paint must be removed back to a solid edge. This is the most labor-intensive and time-consuming part of exterior painting, and it is the step that most determines the longevity of the new paint job. In the Okanagan, south and west-facing walls typically have the most paint failure due to UV exposure and temperature cycling.
Rot repair: Probe all wood surfaces, especially window sills, door frames, trim boards, and anywhere wood contacts masonry. Soft spots indicate rot. Minor rot can be treated with wood hardener and filled with exterior wood filler. Significant rot requires wood replacement.
Caulking: Recaulk all joints between siding and trim, around windows and doors, and anywhere two different materials meet. Use a high-quality exterior caulk rated for paint adhesion and temperature flexibility. Silicone caulk is not paintable - use polyurethane or siliconized acrylic latex.
Priming: Prime all bare wood, repaired areas, and areas where stain-blocking is needed. For exterior applications, use a high-quality exterior primer appropriate for the surface type. Spot priming (priming only problem areas) is acceptable if the existing paint is in good condition overall. Full priming is needed if the existing surface is chalky, stained, or has widespread adhesion problems.
If your home was built before 1978, the existing paint may contain lead. Lead paint is a serious health hazard, especially when scraped or sanded. Have the paint tested before any preparation work begins. If lead is present, the scraping and preparation must follow safe work practices including containment, personal protective equipment, and proper disposal. In many cases, encapsulation (painting over the lead paint with a bonding primer) is preferred over removal.
Choosing Exterior Colors
Work with the fixed elements. Roof color, stone or brick accents, driveway and walkway materials, and landscaping are all visual anchors that influence color choice.
Consider the neighborhood context. In Okanagan neighborhoods, especially newer developments with design guidelines or strata bylaws, there may be restrictions on exterior colors. Check before committing.
The three-color approach works best. Most homes look best with three colors: a body color (the siding - 60 percent of the exterior), a trim color (windows, doors, fascia, corner boards - 30 percent), and an accent color (front door, shutters, detailed trim - 10 percent).
Light colors reflect heat. In the Okanagan's hot summers, light-colored siding stays significantly cooler than dark siding. Dark colors on south and west-facing walls in particular absorb more heat, which stresses the paint film and can contribute to interior cooling costs.
Test in real conditions. Buy sample quarts and apply large test patches on the actual exterior surface. View at different times of day and in different weather conditions. Exterior colors look very different in full sun versus overcast conditions.
Choosing Exterior Paint Products
Acrylic latex: The standard for modern exterior painting. Excellent adhesion, flexibility, breathability, and UV resistance. Cleans up with water. Available in all sheens. This is what most professional painters use for siding and trim.
Oil-based (alkyd): Historically preferred for trim and high-wear areas due to superior hardness and self-leveling. Modern environmental regulations have reduced availability and increased VOC content. Some professional painters still prefer alkyd primers and acrylic latex topcoats for optimal adhesion on bare or problem wood.
Quality matters. This is not the place to save money. A premium exterior paint ($50 to $70 per gallon) contains more resin (the binder that creates the paint film), more pigment (for opacity and color retention), and better additives (for UV resistance, mildew resistance, and adhesion). It covers better, lasts longer, and provides better protection. The labor cost of painting your house is 80 percent of the total project cost - buying cheap paint to save $200 on materials risks the entire $5,000 to $12,000 investment.
For south and west-facing walls in the Okanagan that receive intense UV, consider a paint specifically formulated for high-UV environments. Several premium manufacturers (Benjamin Moore Aura Exterior, Sherwin-Williams Duration, Dulux Diamond) offer products with enhanced UV-resistant pigments and resins that hold color and integrity longer in high-sun climates.
Hiring a Painter: What to Look For
Credentials and Insurance
Business license: Verify the painter holds a valid business license for the municipality where the work will be performed.
Insurance: Request a certificate of insurance showing commercial general liability (minimum $2 million) and WorkSafeBC registration. If a painter or their employee is injured on your property without WorkSafeBC coverage, you may be held liable.
References: Ask for 3 to 5 references from recent projects similar to yours (interior for interior, exterior for exterior). Contact each reference and ask about communication, timeliness, attention to detail, cleanup, and whether they would hire the painter again.
What to Expect in a Quote
A professional painting quote should specify the scope of work in detail (which rooms, which surfaces, how many coats), the preparation included (patching, sanding, priming, caulking), paint product and color (brand, product line, finish), the timeline (start date, expected completion), payment schedule, and warranty (typically 2 years for workmanship).
Red flags in quotes: No written estimate (verbal only), extremely low pricing compared to other bids (corners will be cut somewhere, usually preparation), no insurance or WorkSafeBC, reluctance to specify paint products, and upfront payment of more than 25 percent.
Getting Multiple Quotes
Get at least three quotes for any painting project. Ensure each painter quotes the same scope so comparisons are meaningful. The cheapest quote is often the worst value - if one painter is 40 percent below the others, they are either cutting preparation, using inferior products, or running an unsustainable business.
Timeline Expectations
Interior Painting
Single room: 1 to 2 days including prep, two coats, and cleanup. Whole house interior (3-bedroom): 5 to 8 days for a professional crew of 2 to 3 painters. Kitchen cabinets: 4 to 7 days (cabinets require extensive prep, priming, and multiple coats with dry time between).
Exterior Painting
Preparation: 2 to 5 days depending on condition (significant scraping and repair adds time). Painting: 3 to 5 days for a typical Okanagan home with a professional crew. Total exterior project: 5 to 10 days, weather permitting.
Weather delays: In the Okanagan, spring and fall painting projects should account for potential rain delays. Rain during application or within 24 hours of application can ruin fresh paint. Professional painters monitor weather forecasts and schedule accordingly.
Maintaining Your Paint Job
Interior Maintenance
Touch up promptly. Keep leftover paint for touch-ups (store in a cool, dark place with the label facing out). Address scuffs and marks before they become ingrained.
Clean painted walls carefully. Use a damp cloth for eggshell and satin finishes. Avoid abrasive cleaners. For stubborn marks on semi-gloss surfaces, a solution of warm water and mild dish soap works well.
Address moisture issues. Paint failure in bathrooms and kitchens is almost always caused by moisture. Ensure exhaust fans are operating and running during and after moisture-producing activities.
Exterior Maintenance
Inspect annually. Walk the exterior each spring and note any areas where paint is failing, caulking is cracking, or wood is deteriorating. Addressing small issues annually prevents the need for a full repaint.
Wash the exterior. Annual soft washing or gentle pressure washing removes dirt, pollen, and biological growth that degrades paint over time.
Touch up bare spots. Exposed wood deteriorates rapidly in the Okanagan's UV-intense environment. Touch up any bare spots as soon as you notice them to prevent moisture infiltration and wood damage.
Maintain caulking. Inspect and replace deteriorating caulk annually. Failed caulking allows water behind siding, which causes paint failure from behind - the type of failure no amount of repainting will solve.
Get Your Home Ready for Painting
Whether you are preparing for a DIY weekend project or getting your home ready for a professional crew, preparation is the foundation of a great paint job. And if your home needs exterior cleaning, minor repairs, or other maintenance before the painters arrive, My Home Plan can help.
Our team serves homeowners across Kelowna, West Kelowna, Penticton, Vernon, Lake Country, and surrounding Okanagan communities with pressure washing, cleaning, and home maintenance services that get your property ready for any project.
Explore our maintenance plans or get a free quote for the pre-painting preparation services your home needs.
Frequently Asked Questions
Why Homeowners Choose My Home Plan
Predictable Pricing
One monthly payment covers everything. No surprise quotes or hidden fees.
Vetted Contractors
Every contractor is background-checked, insured, and reviewed.
Zero Hassle
We handle scheduling, quality control, and follow-ups. You relax.
Related Articles
The Complete Home Painting Guide for Okanagan Homeowners: Interior, Exterior, and Everything in Between
Whether you're refreshing your living room or protecting your home's exterior from Okanagan weather, this guide covers everything you need to know about house painting - from paint selection and prep work to realistic cost estimates and when to hire a professional.

The Complete Guide to Pressure Washing Your Home in the Okanagan
From driveways to decks to vinyl siding, pressure washing is one of the most effective ways to maintain your Okanagan home's appearance and value. This complete guide covers PSI settings by surface, cost breakdowns, when to DIY, and when to call a professional.

The Complete Pre-Sale Home Maintenance Checklist for Okanagan Homeowners (30 Items)
Selling your Okanagan home? This 30-item pre-sale maintenance checklist covers everything from 6 months out to listing day, with cost-vs-value analysis for each task. Know exactly what to fix, what to skip, and what timeline to follow.