Water Heater Maintenance: How to Extend Its Lifespan and Avoid Costly Failures
Complete water heater maintenance guide. Flushing, anode rod replacement, signs of failure, cost comparisons, and how to extend lifespan by 5-8 years.
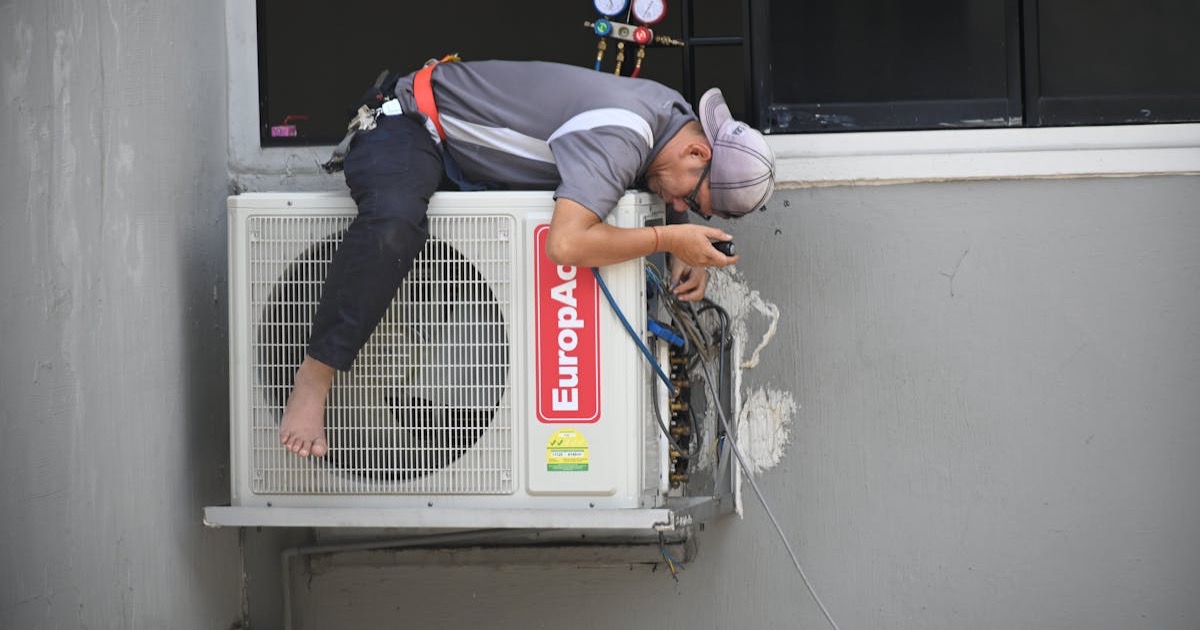
Your water heater works 365 days a year, heating and reheating water for showers, dishes, laundry, and cleaning. It is one of the hardest-working appliances in your home, and one of the most ignored until the morning you wake up to a cold shower or, worse, a flooded utility room.
The average water heater fails after 8 to 12 years with maintenance, or 6 to 8 years without. The failure is rarely graceful. A corroded tank does not leak a little - it releases 40 to 60 gallons of water (150 to 225 liters) onto your floor, damaging flooring, drywall, stored items, and anything else in the path. If the water heater is on an upper floor, the damage multiplies.
The good news is that water heater maintenance is simple, inexpensive, and dramatically extends the useful life of the unit. Annual flushing and periodic anode rod replacement can add 5 to 8 years to your water heater's lifespan - years of service that cost almost nothing compared to premature replacement.
Understanding Your Water Heater
Conventional Tank Water Heaters
The most common type in Okanagan homes. A tank (typically 40 to 60 gallons for residential use) holds and heats water continuously, maintaining a set temperature so hot water is available on demand. Powered by natural gas, propane, or electricity.
Key components that require maintenance:
- Tank (steel, glass-lined interior)
- Anode rod (sacrificial corrosion protection)
- Dip tube (directs cold water to tank bottom)
- Temperature and pressure relief (TPR) valve (safety device)
- Drain valve (for flushing)
- Burner assembly (gas) or heating elements (electric)
- Thermostat
Tankless Water Heaters
Heats water on demand as it flows through the unit, without storing it. More energy-efficient than tank units because they do not maintain a standing tank of hot water. Gas or electric.
Key maintenance need: Descaling. The heat exchanger inside a tankless unit is susceptible to mineral scale buildup, especially in areas with hard water. Annual descaling with a vinegar flush is essential.
Heat Pump Water Heaters
Uses heat pump technology to extract heat from the surrounding air and transfer it to the water. Highly efficient (2 to 3 times more efficient than conventional electric) but more complex mechanically.
Key maintenance needs: Air filter cleaning (monthly), condensate drain check, and annual professional service.
The Three Essential Maintenance Tasks
Task 1: Annual Tank Flushing
Sediment accumulates at the bottom of every tank water heater. Minerals from the water supply (calcium, magnesium, and silica) settle out of heated water and form a layer of gritty deposits at the tank bottom. In the Okanagan, where municipal water has moderate mineral content, this buildup is significant.
Why it matters:
Sediment insulates the tank bottom from the burner (gas units) or heating element (electric units), forcing the system to work harder to heat the same amount of water. This wastes energy - up to 25 percent in heavily sedimented tanks. The trapped sediment also accelerates corrosion at the tank bottom, which is the most common failure point. And in gas units, an insulating layer of sediment causes the burner to overheat the tank bottom, which can warp the tank and cause premature failure.
The sounds. If your water heater makes rumbling, popping, or crackling sounds during heating cycles, sediment is almost certainly the cause. Those sounds are pockets of water trapped under the sediment layer boiling and pushing through the deposits. The louder the sounds, the more sediment has accumulated.
How to flush a tank water heater:
Step 1: Turn off the heating source. For gas, turn the gas valve to "pilot." For electric, turn off the breaker.
Step 2: Connect a garden hose to the drain valve at the bottom of the tank. Run the hose to a floor drain, utility sink, or outside (the water will be very hot - use caution).
Step 3: Open the TPR valve or a hot water faucet somewhere in the house to break the vacuum.
Step 4: Open the drain valve and let water flow until it runs clear. This usually takes 5 to 10 minutes. If the water is very sediment-laden, you may need to close the valve, let the tank refill partially, and drain again to flush more sediment.
Step 5: Close the drain valve, remove the hose, close the TPR valve (or hot water faucet), let the tank refill completely (you will hear it filling), then turn the heating source back on.
Step 6: Run a hot water faucet for a minute to clear any remaining sediment from the pipes.
Water from the drain valve is scalding hot - typically 50 to 60 degrees Celsius. Wear gloves, keep children and pets away, and ensure the hose end drains to a safe location. If the water drains outside, let it cool before allowing anyone to walk through the area.
Task 2: Anode Rod Inspection and Replacement
The anode rod is the unsung hero of water heater longevity. It is a metal rod (typically magnesium or aluminum, sometimes with a zinc core) that hangs inside the tank from the top. Its sole purpose is to corrode instead of the tank.
Water is corrosive. It wants to dissolve metal. The anode rod is made of a more reactive metal than the steel tank, so corrosive elements in the water attack the rod first, leaving the tank walls intact. When the anode rod is fully depleted, the corrosion shifts to the tank itself, and failure becomes a matter of when, not if.
Inspection frequency: Check the anode rod every 2 to 3 years. Replace when it is more than 50 percent depleted (the wire core is exposed along much of the rod's length).
Replacement frequency: Typically every 3 to 5 years, depending on water quality. Homes with water softeners may deplete anode rods faster because softened water is more corrosive. Homes with very hard water may need replacement every 2 to 3 years.
How to check and replace the anode rod:
Step 1: Turn off the heating source and water supply.
Step 2: Locate the anode rod fitting on top of the tank. It is usually a hex head fitting, either visible on the tank top or concealed under a plastic cap.
Step 3: Using a 1-1/16 inch socket wrench with a breaker bar (anode rods are torqued tightly and may require significant force), loosen and remove the rod.
Step 4: Inspect the rod. If it is less than 1/2 inch in diameter (originally about 3/4 inch) or the steel wire core is widely exposed, replace it.
Step 5: Install the new rod, wrapping the threads with Teflon tape. Tighten firmly.
Step 6: Restore water supply and heating source.
Cost: Anode rods cost $20 to $50. Professional replacement costs $150 to $250 including the rod.
If your water heater is in a tight space with low ceiling clearance, a standard anode rod (which is 3 to 4 feet long) may not fit. Flexible (segmented) anode rods are available that fold to insert through the top of the tank and straighten once inside. These cost slightly more ($30 to $60) but solve the clearance problem.
Task 3: TPR Valve Testing
The temperature and pressure relief valve is a critical safety device. If the tank overheats or builds excessive pressure, the TPR valve opens to release water and pressure, preventing the tank from becoming a steam bomb. This is not an exaggeration - an unrelieved water heater tank failure can be explosive.
Test annually:
Place a bucket under the TPR valve discharge pipe. Lift the valve lever for 5 seconds. Hot water should flow from the discharge pipe. Release the lever - the flow should stop immediately.
If no water flows, the valve may be stuck and needs replacement. If water continues to flow after releasing the lever, the valve is not seating properly and needs replacement. Both scenarios require a plumber.
Do not skip this test. A failed TPR valve is a safety hazard that can result in catastrophic tank failure.
Cost: TPR valve replacement costs $20 to $40 for the valve plus $75 to $150 for professional installation.
Additional Maintenance Tasks
Check the Temperature Setting
Most water heaters are factory-set to 140 degrees Fahrenheit (60 degrees Celsius). The recommended setting is 120 degrees Fahrenheit (49 degrees Celsius). This reduces energy consumption by 6 to 10 percent, reduces scalding risk (especially important in homes with children or elderly residents), and slows mineral buildup.
Inspect the Flue and Venting (Gas Units)
For gas water heaters, inspect the vent pipe and chimney connection annually. Look for corrosion, disconnected sections, and signs of backdrafting (soot or scorch marks around the draft hood). A blocked or disconnected flue can cause carbon monoxide to enter the home.
Check for Leaks
Inspect around the base of the tank, at pipe connections, at the TPR valve, and at the drain valve. Any moisture indicates a problem that needs attention. Small leaks at fittings can often be tightened. Moisture at the tank base may indicate tank corrosion, which means the tank is approaching failure.
Insulate the Tank and Pipes
If your water heater is in an unheated space (garage, crawl space, unfinished basement), an insulation blanket reduces standby heat loss by 25 to 45 percent. Cost: $20 to $40. Hot water pipe insulation on the first 6 feet of pipe from the tank also reduces heat loss. Cost: $10 to $20.
Do not insulate the top of a gas water heater or cover the thermostat, burner access, or TPR valve. Follow the insulation blanket manufacturer's instructions carefully. For electric water heaters, insulation blankets can be applied more liberally since there are no combustion air concerns.
Tankless Water Heater Maintenance
Annual Descaling
Tankless water heaters have a compact heat exchanger that is highly susceptible to mineral scale. Scale buildup reduces heat transfer efficiency, restricts water flow, and can eventually damage the heat exchanger (the most expensive component to replace).
The descaling process:
Step 1: Turn off the unit and close the hot and cold water isolation valves.
Step 2: Connect two hoses to the service valves. One from a small submersible pump placed in a 5-gallon bucket of white vinegar. The other returning to the bucket from the hot side service valve.
Step 3: Open the service valves and run the pump to circulate vinegar through the heat exchanger for 45 to 60 minutes. The vinegar dissolves calcium and magnesium deposits.
Step 4: Drain the vinegar, flush with clean water for 5 minutes, remove the hoses, close the service valves, open the isolation valves, and restart the unit.
Professional descaling costs $150 to $250 in the Okanagan. DIY requires a descaling kit ($100 to $150 for the pump and hoses, reusable for future services).
Clean the Inlet Filter
Tankless water heaters have a small mesh filter on the cold water inlet. Check and clean every 6 months. Debris accumulation restricts water flow and can cause error codes.
Check the Venting (Gas Units)
Inspect the exhaust vent for blockages, damage, and proper connections annually. Condensing tankless units produce acidic condensate that must drain properly - check the condensate drain line.
Signs Your Water Heater Is Failing
Rusty or Discolored Hot Water
If hot water runs rust-colored from multiple faucets (not just one faucet with old pipes), the tank interior is corroding. This is a late-stage warning sign. Once the tank is rusting from the inside, replacement is approaching.
Rumbling, Popping, or Banging Sounds
Sediment buildup. Flushing may resolve the noise if the buildup is moderate. If flushing does not help or the sounds return quickly, significant sediment has hardened on the tank bottom and may be beyond simple flushing.
Water Around the Base
Any water pooling around the base of the water heater requires immediate investigation. It could be a leaking TPR valve, a loose drain valve, a pipe fitting leak, or - most seriously - a crack in the tank itself. If the tank is cracking, replacement is immediate.
Reduced Hot Water Supply
If the tank produces less hot water than it used to (shorter showers before the water goes cold), the heating element may be failing (electric), the burner may need servicing (gas), or sediment has reduced the effective tank volume.
Age
A tank water heater over 10 years old with no maintenance history is a replacement candidate regardless of symptoms. The risk of catastrophic failure increases significantly after 10 years, and the cost of water damage from a tank failure far exceeds the cost of proactive replacement.
Replacement Cost Comparison
When it is time to replace, here are typical costs in the Okanagan.
Conventional gas tank (40-50 gallon): $1,200 to $2,500 installed. Conventional electric tank (40-50 gallon): $1,000 to $2,000 installed. Tankless gas: $3,000 to $5,500 installed. Tankless electric: $1,500 to $3,500 installed. Heat pump water heater: $2,500 to $4,500 installed.
BC Hydro and FortisBC offer rebates for high-efficiency water heaters and heat pump water heaters. Check current incentive programs before purchasing - rebates of $500 to $1,000 are common and significantly improve the payback period for higher-efficiency units.
The Maintenance Math
Here is the simple calculation. Annual maintenance (flushing and periodic anode rod replacement) costs approximately $100 to $250 per year if professionally done, or $25 to $50 per year DIY. Over 10 years, that is $250 to $2,500 in maintenance investment.
Without maintenance, a water heater lasts 6 to 8 years before failing (often catastrophically, with water damage). Replacement cost: $1,200 to $2,500. Water damage repair: $2,000 to $10,000+.
With maintenance, the same water heater lasts 10 to 15 years and is much more likely to give warning signs before failure, allowing for planned replacement without emergency costs and water damage.
The return on maintenance investment is not just positive - it is one of the best ROI maintenance tasks a homeowner can perform.
Stay Ahead of Water Heater Problems
Your water heater is one of those systems you want to maintain proactively rather than replace reactively. The cost difference between planned maintenance and emergency replacement is measured in thousands of dollars and the hassle of dealing with water damage.
My Home Plan includes HVAC and home system maintenance coordination for homeowners across the Okanagan. Our team serves Kelowna, West Kelowna, Penticton, Vernon, Lake Country, and surrounding communities with comprehensive maintenance plans that keep every system in your home operating reliably.
Explore our maintenance plans or get a free quote to see how water heater care fits into a complete home maintenance subscription.
Frequently Asked Questions
Why Homeowners Choose My Home Plan
Predictable Pricing
One monthly payment covers everything. No surprise quotes or hidden fees.
Vetted Contractors
Every contractor is background-checked, insured, and reviewed.
Zero Hassle
We handle scheduling, quality control, and follow-ups. You relax.
Related Articles
The Complete HVAC Maintenance Schedule Every Homeowner Needs (2026 Guide)
A complete HVAC maintenance schedule covering monthly, seasonal, and annual tasks. Learn exactly what to do yourself and when to call a professional to keep your heating and cooling system running efficiently for years longer.
10 Home Repairs You Should Never Ignore (And What They Cost If You Do)
Deferred maintenance is the most expensive decision a homeowner can make. These 10 repairs seem minor today but turn into thousands of dollars in damage if ignored. Here's what to watch for, what it costs to fix now versus later, and how to prioritize when money is tight.
Home Maintenance Costs in 2026: A Complete Service-by-Service Breakdown
How much does home maintenance actually cost in 2026? We break down every service, show annual totals by home size, explain the 1% rule, and compare subscription plans to paying contractors individually.